Creating a Case Resolution Flow
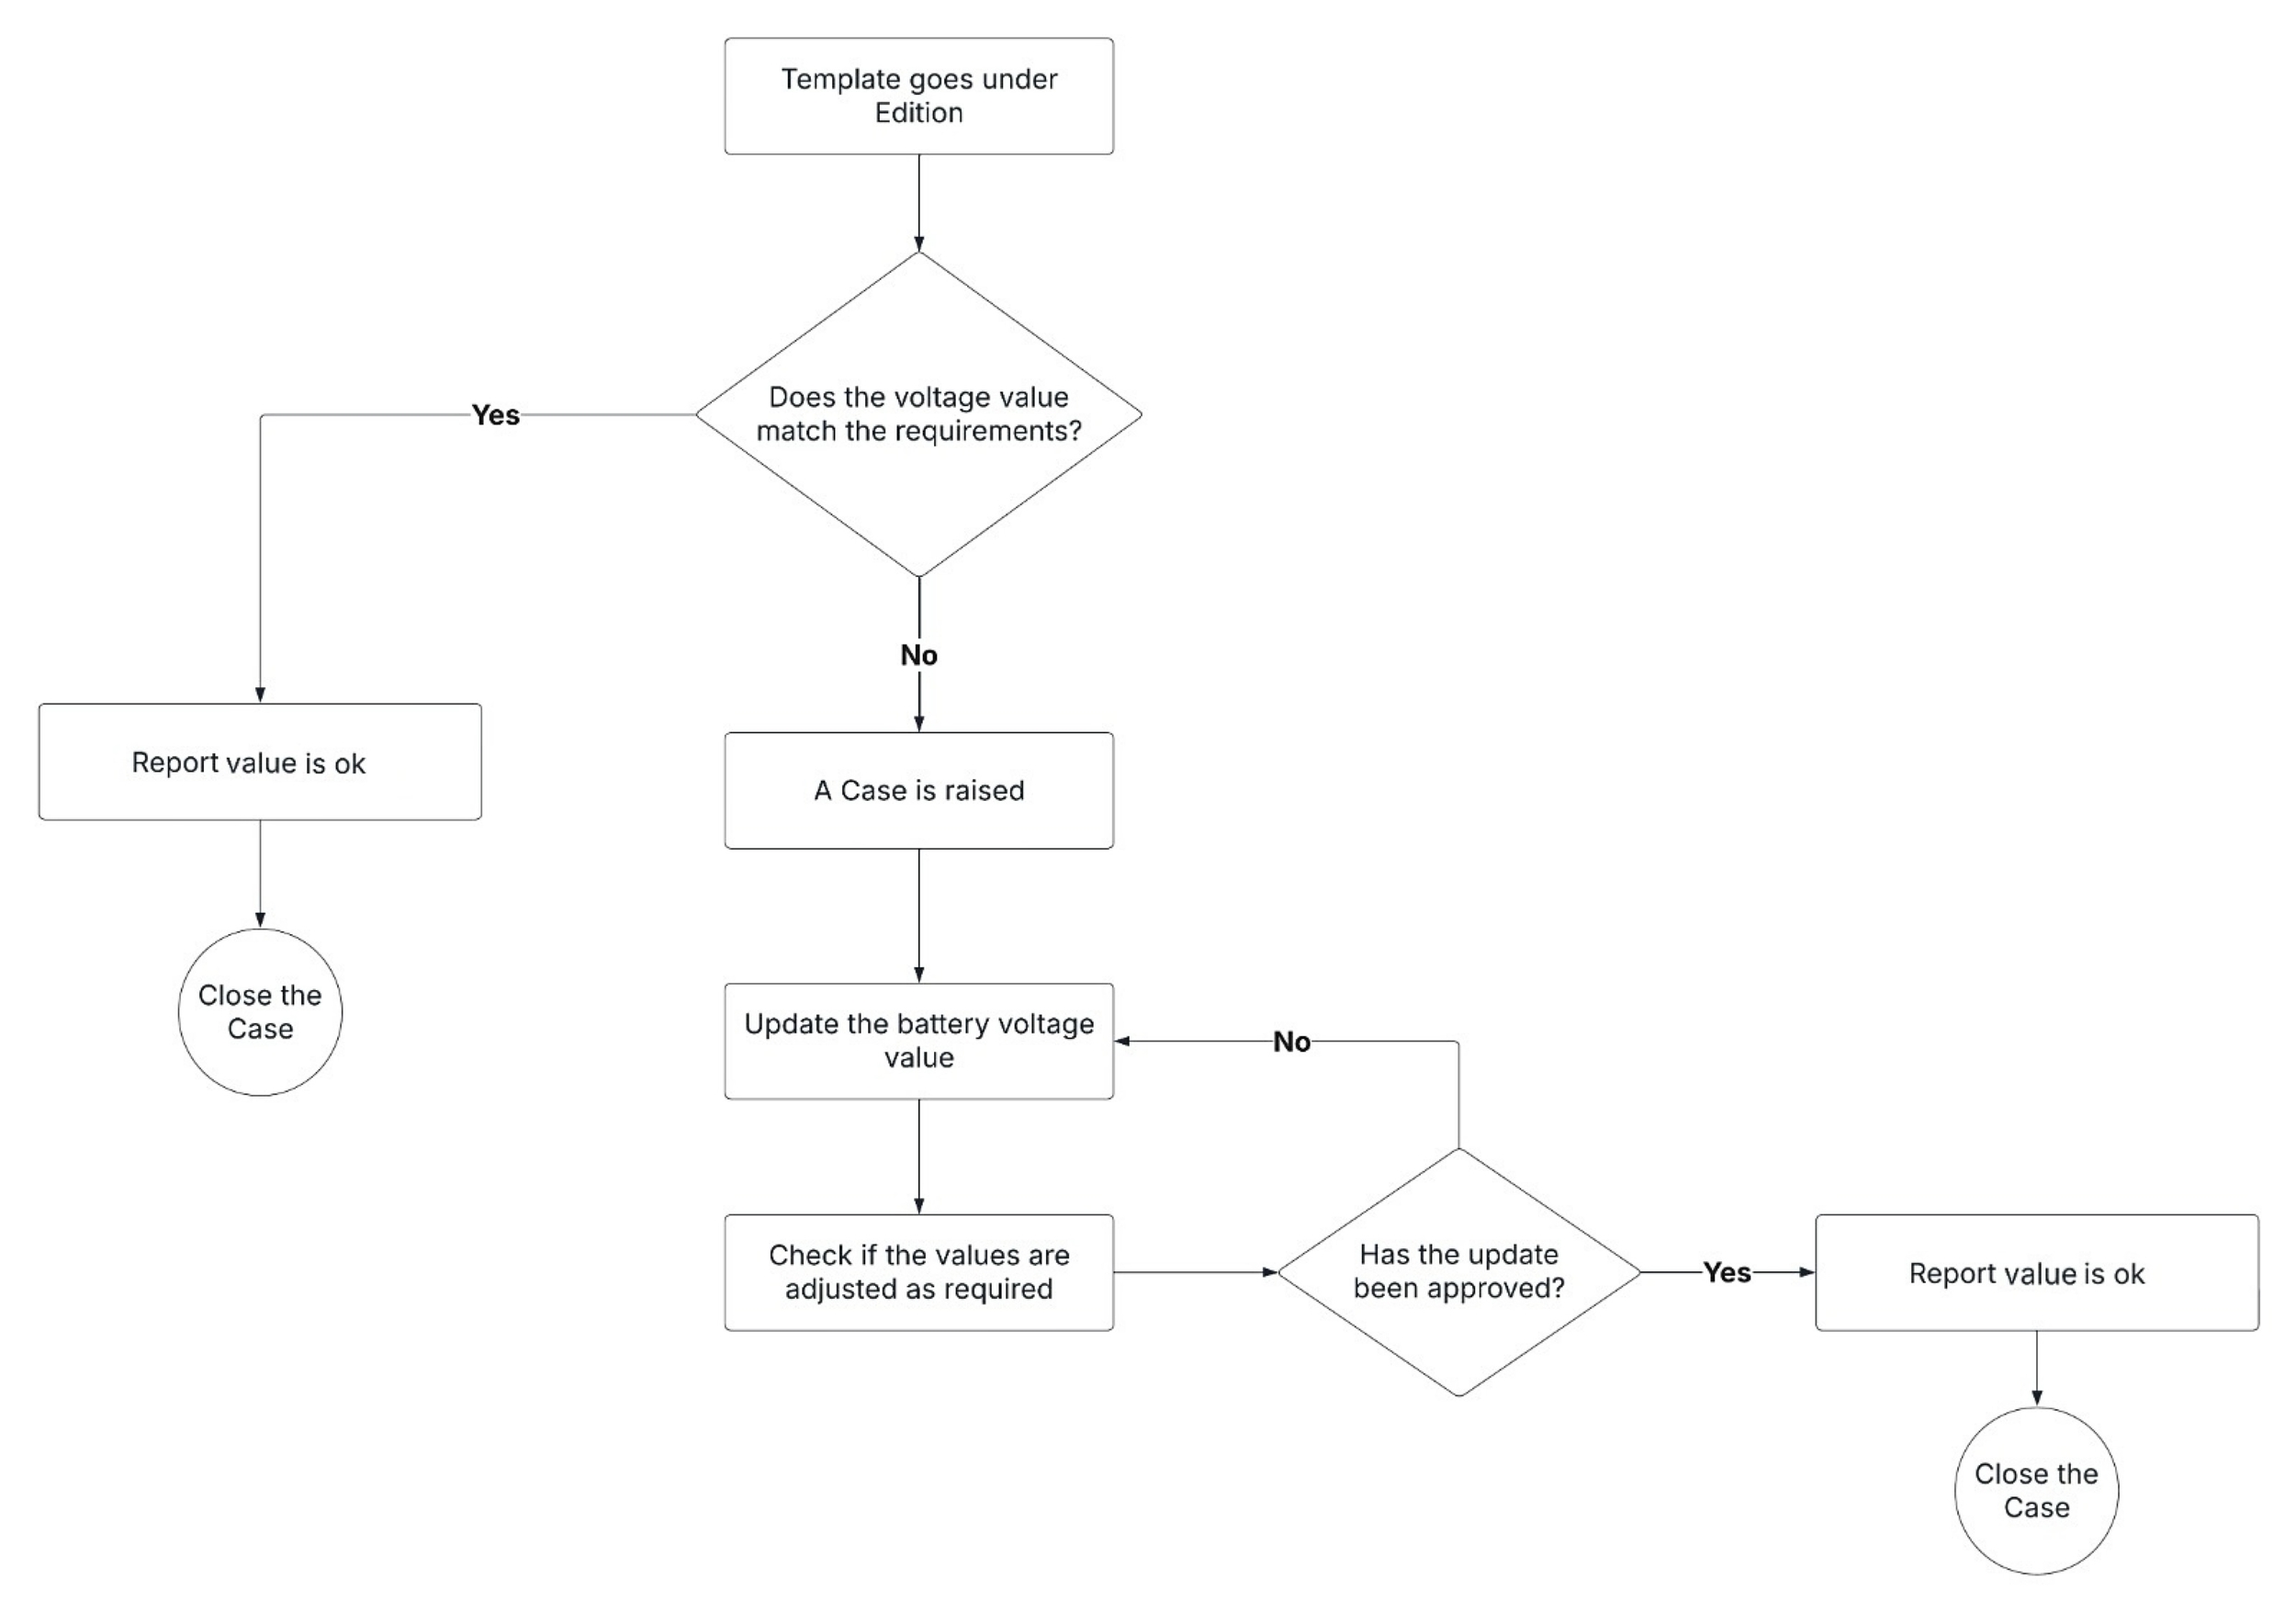
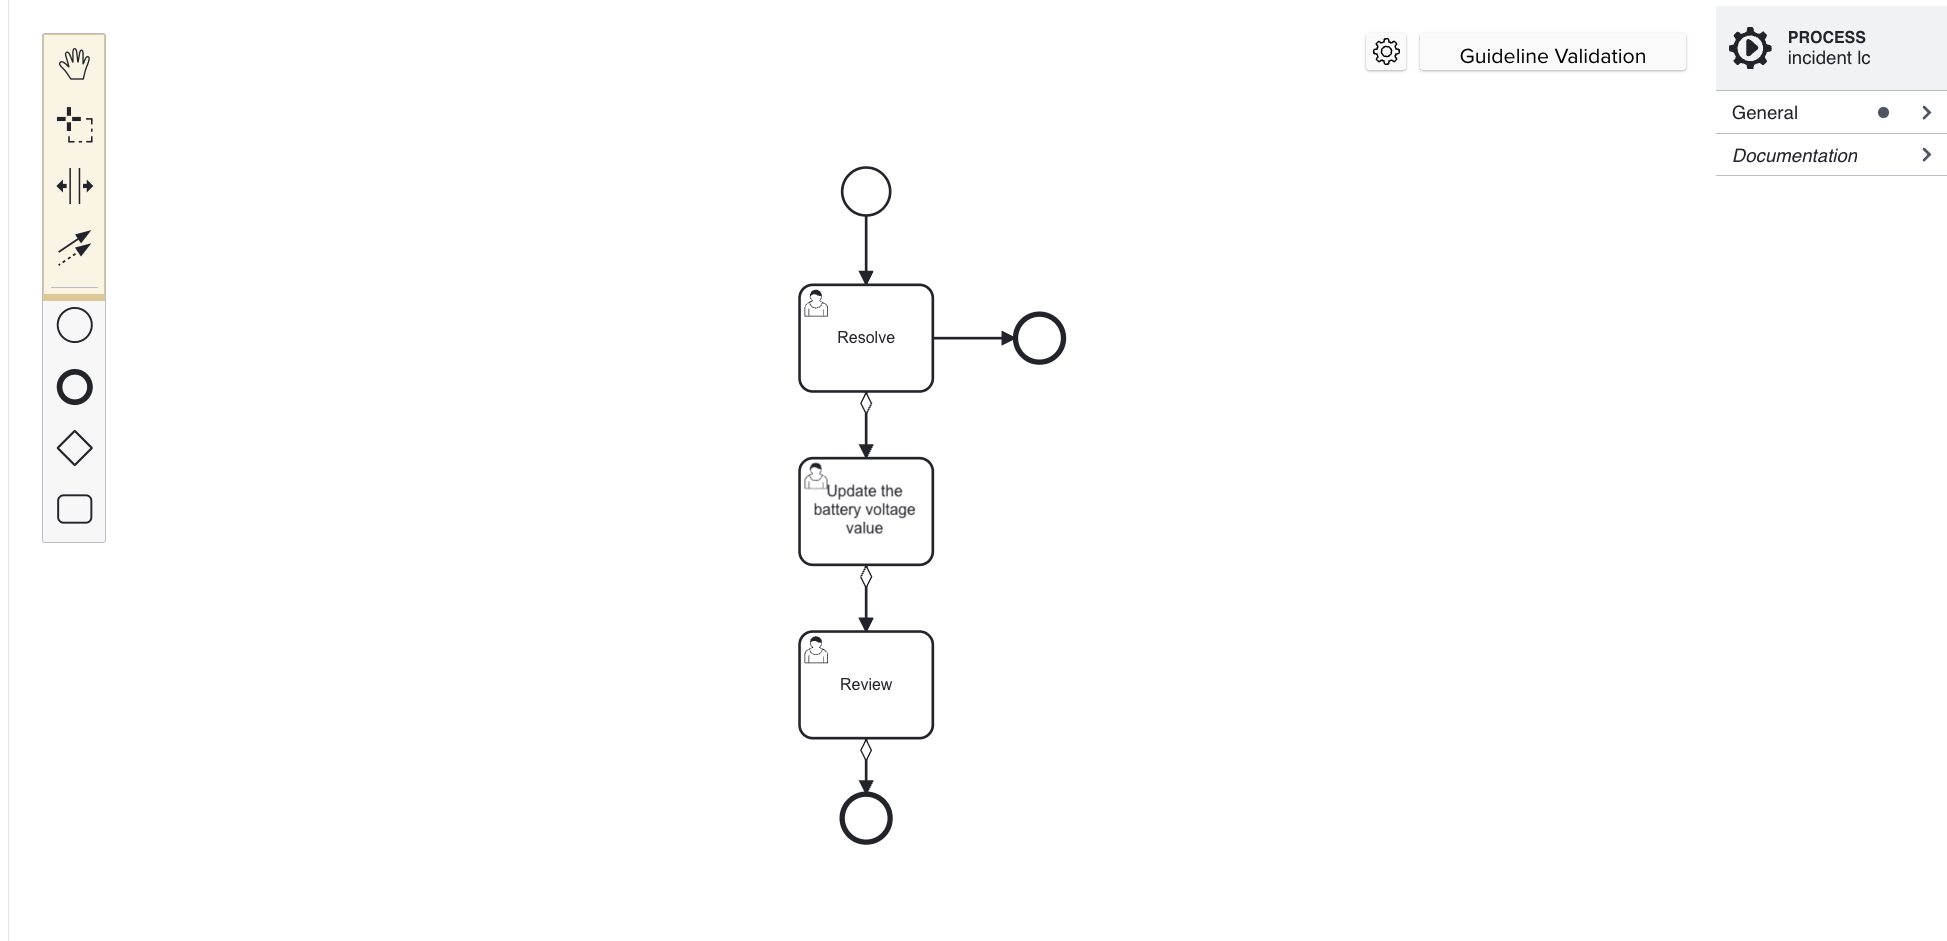
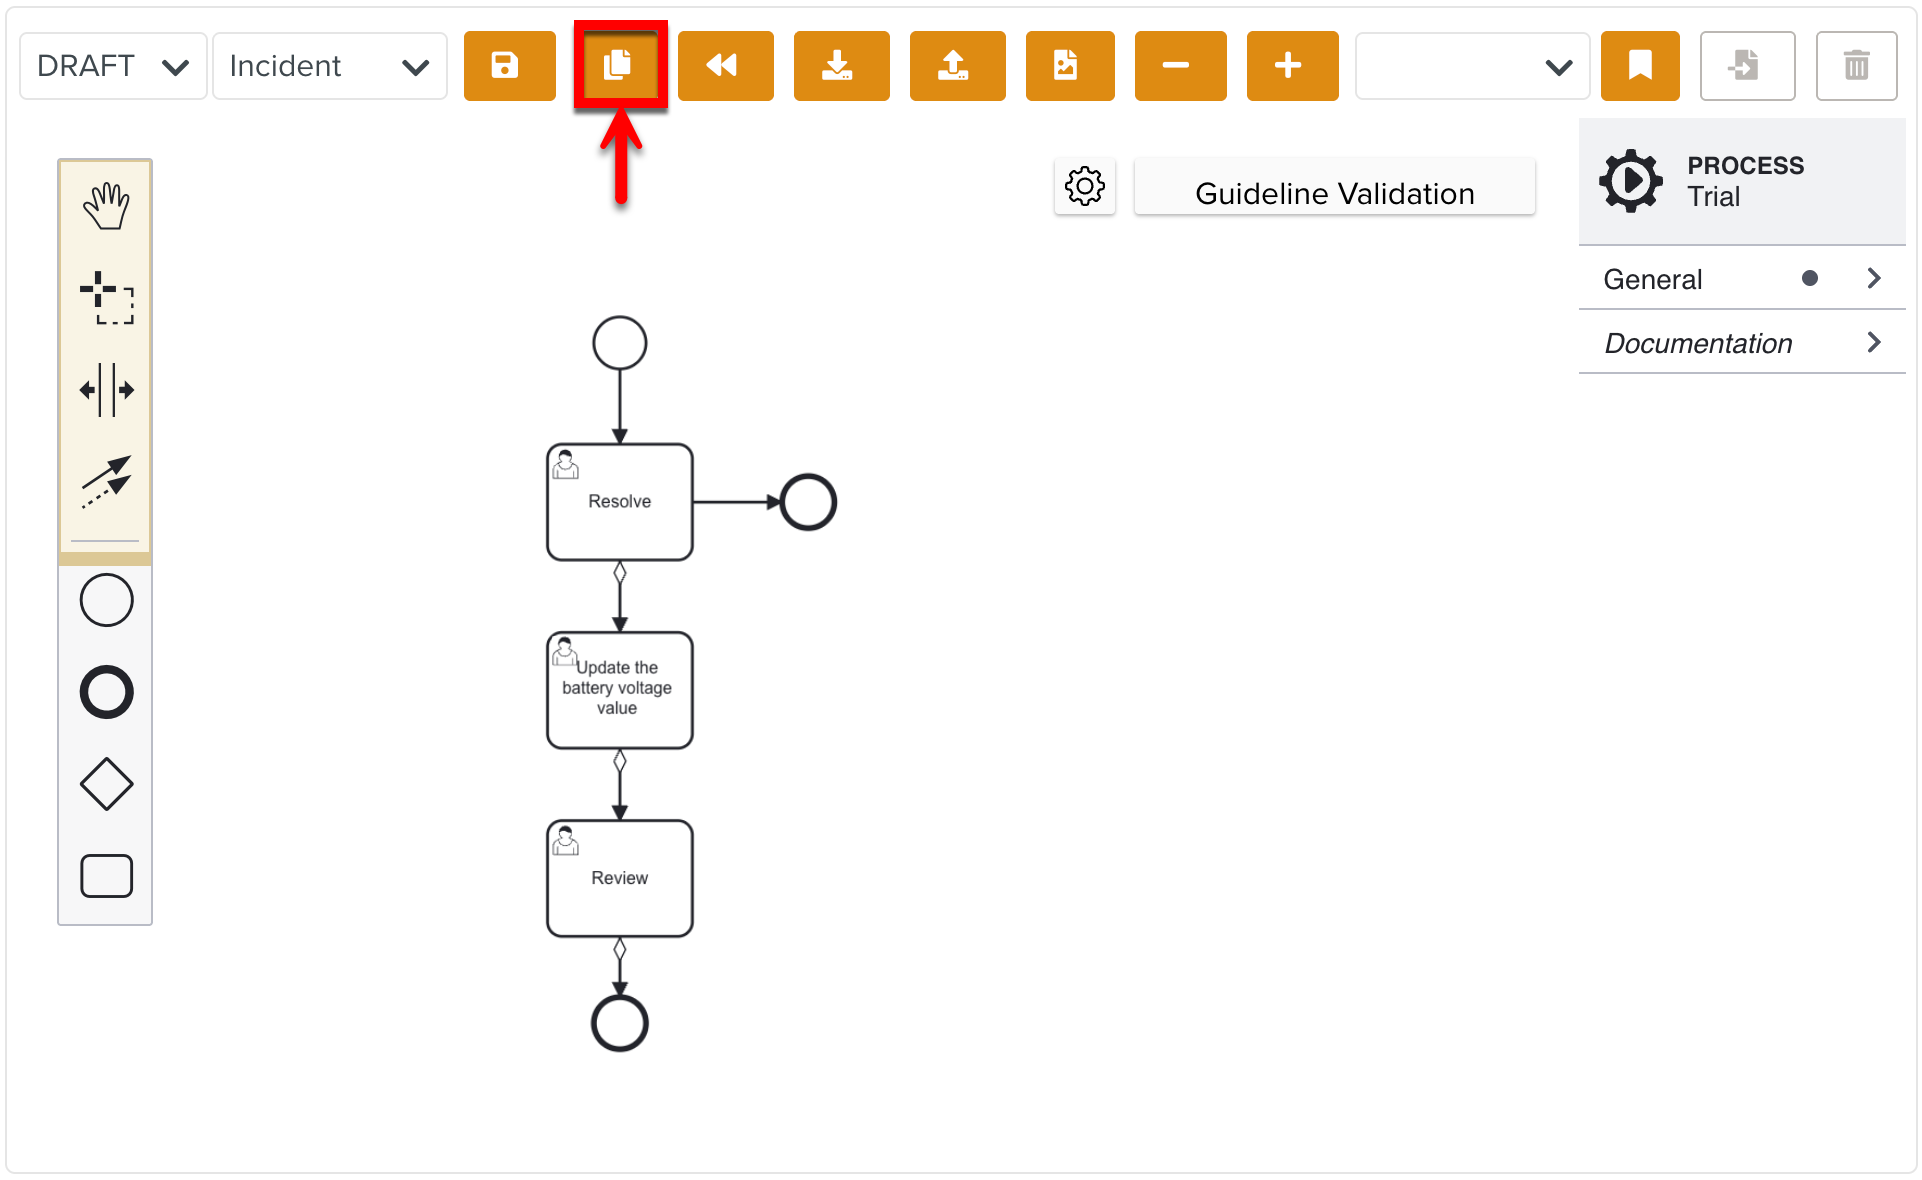
A Resolution Flow is created to determine how a Case can be handled and resolved. For example, the Resolution Flow for a Battery Voltage Check Case shown below contains steps to resolve the battery voltage anomaly.
 |
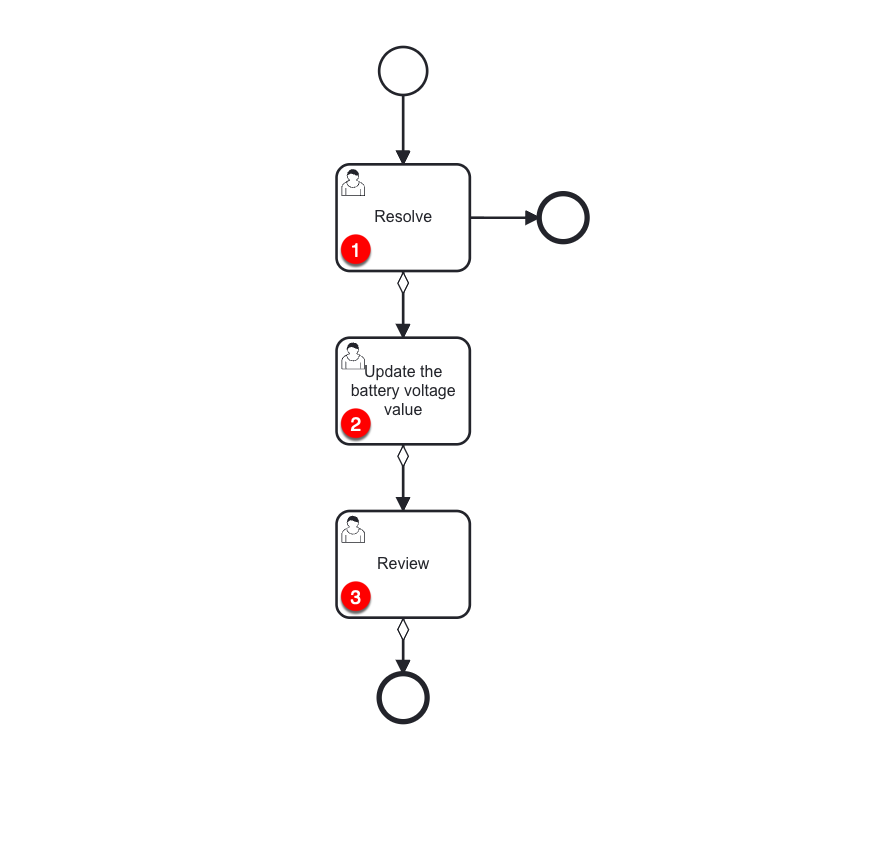
You can build this Resolution Flow as a Custom Lifecycle of type Incident. Note that there are three User Task elements corresponding to the tasks required to update the battery voltage value.
 |
Each User Task can be assigned to a specific User Role. Only users with the assigned role can view, initiate, or complete the Task. This ensures Tasks are managed securely and in accordance with the responsibilities assigned to each Role.
You can select a User Role from the dropdown as shown.
 |
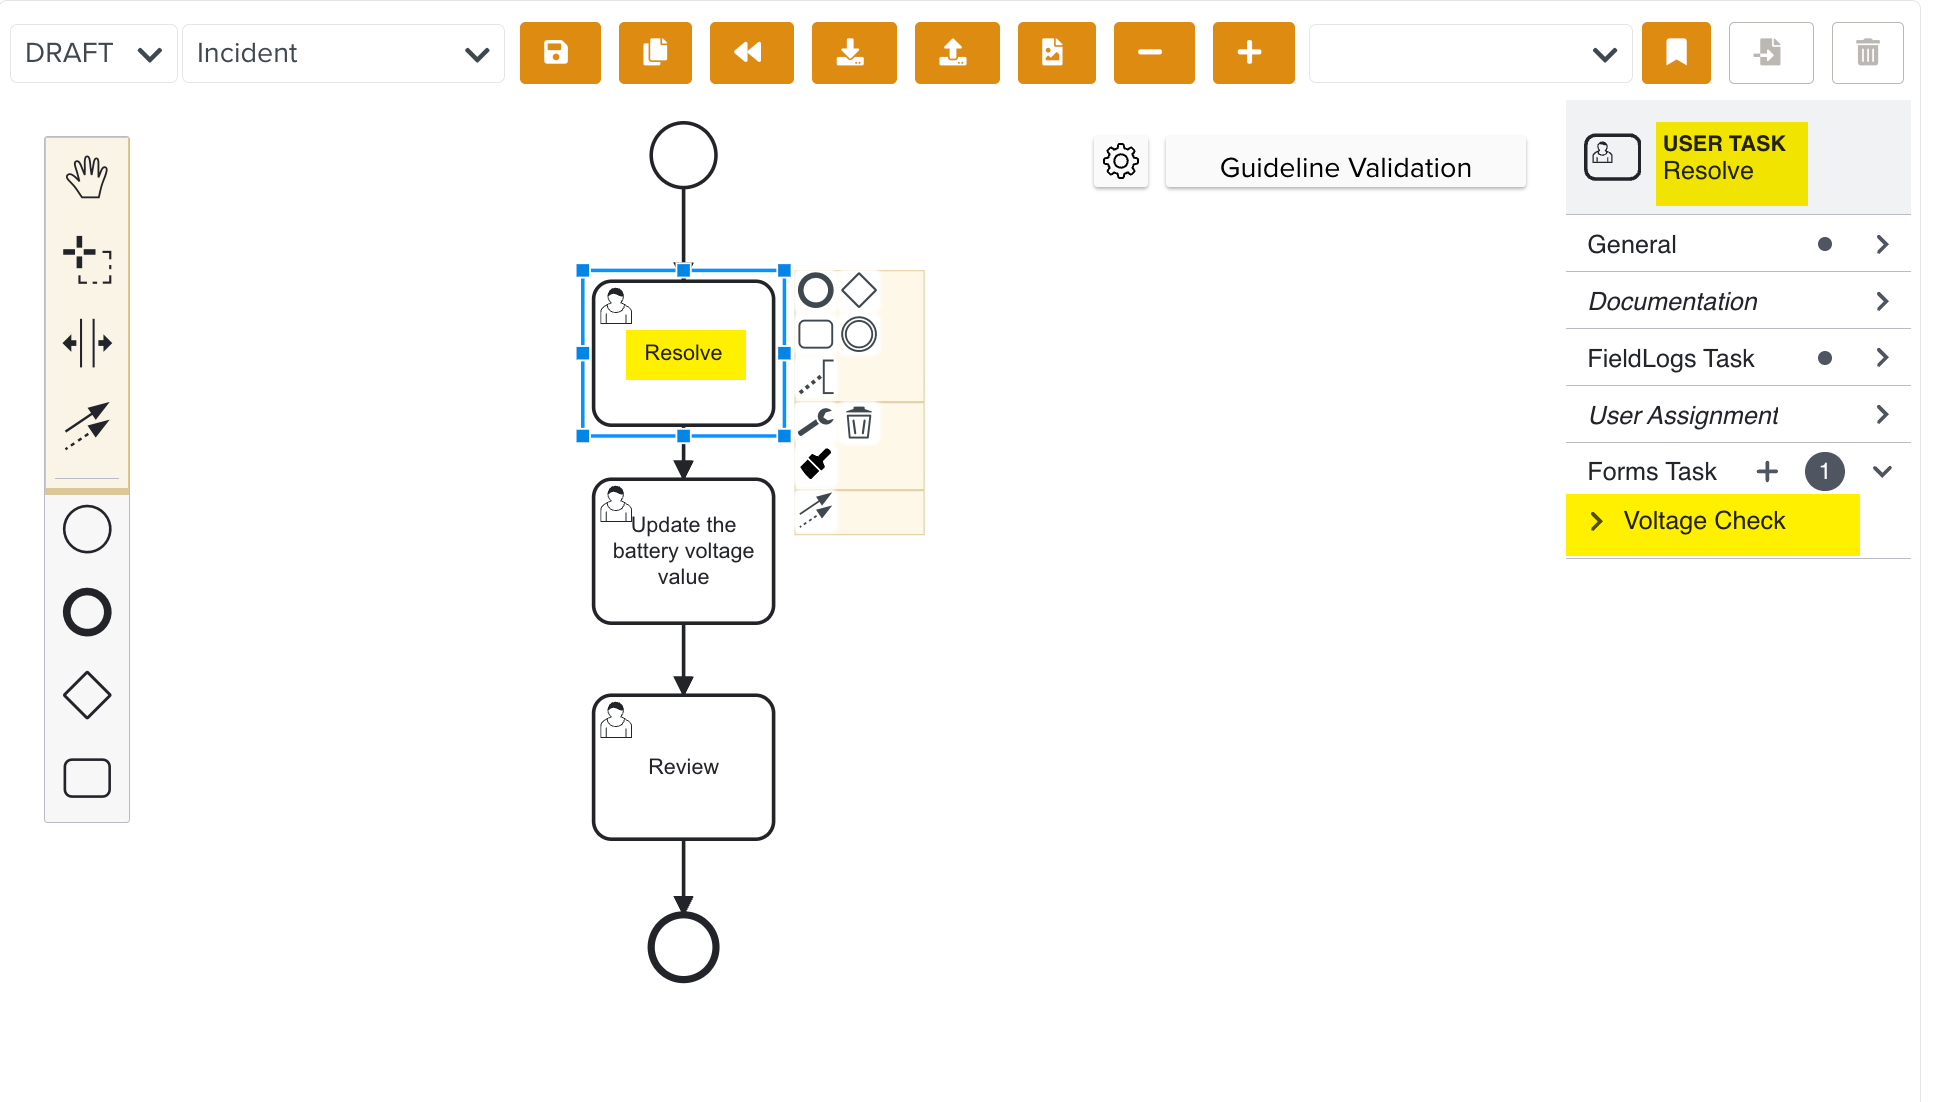
You can link Lifecycle Forms to the User Tasks if required. Each User Task can have a different form attached to it. This allows users to enter specific information relevant to the Task during the completion.
The collection of customized data inputs for each Task ensures that all the necessary information is captured accurately as per the Task’s requirements.
For the current example, Lifecycle Forms are linked to Resolve and Review.
The technician will record the results using the Lifecycle Form Voltage Check as shown below.
 |
The supervisor will approve or reject the work using another Lifecycle Form Voltage Review.
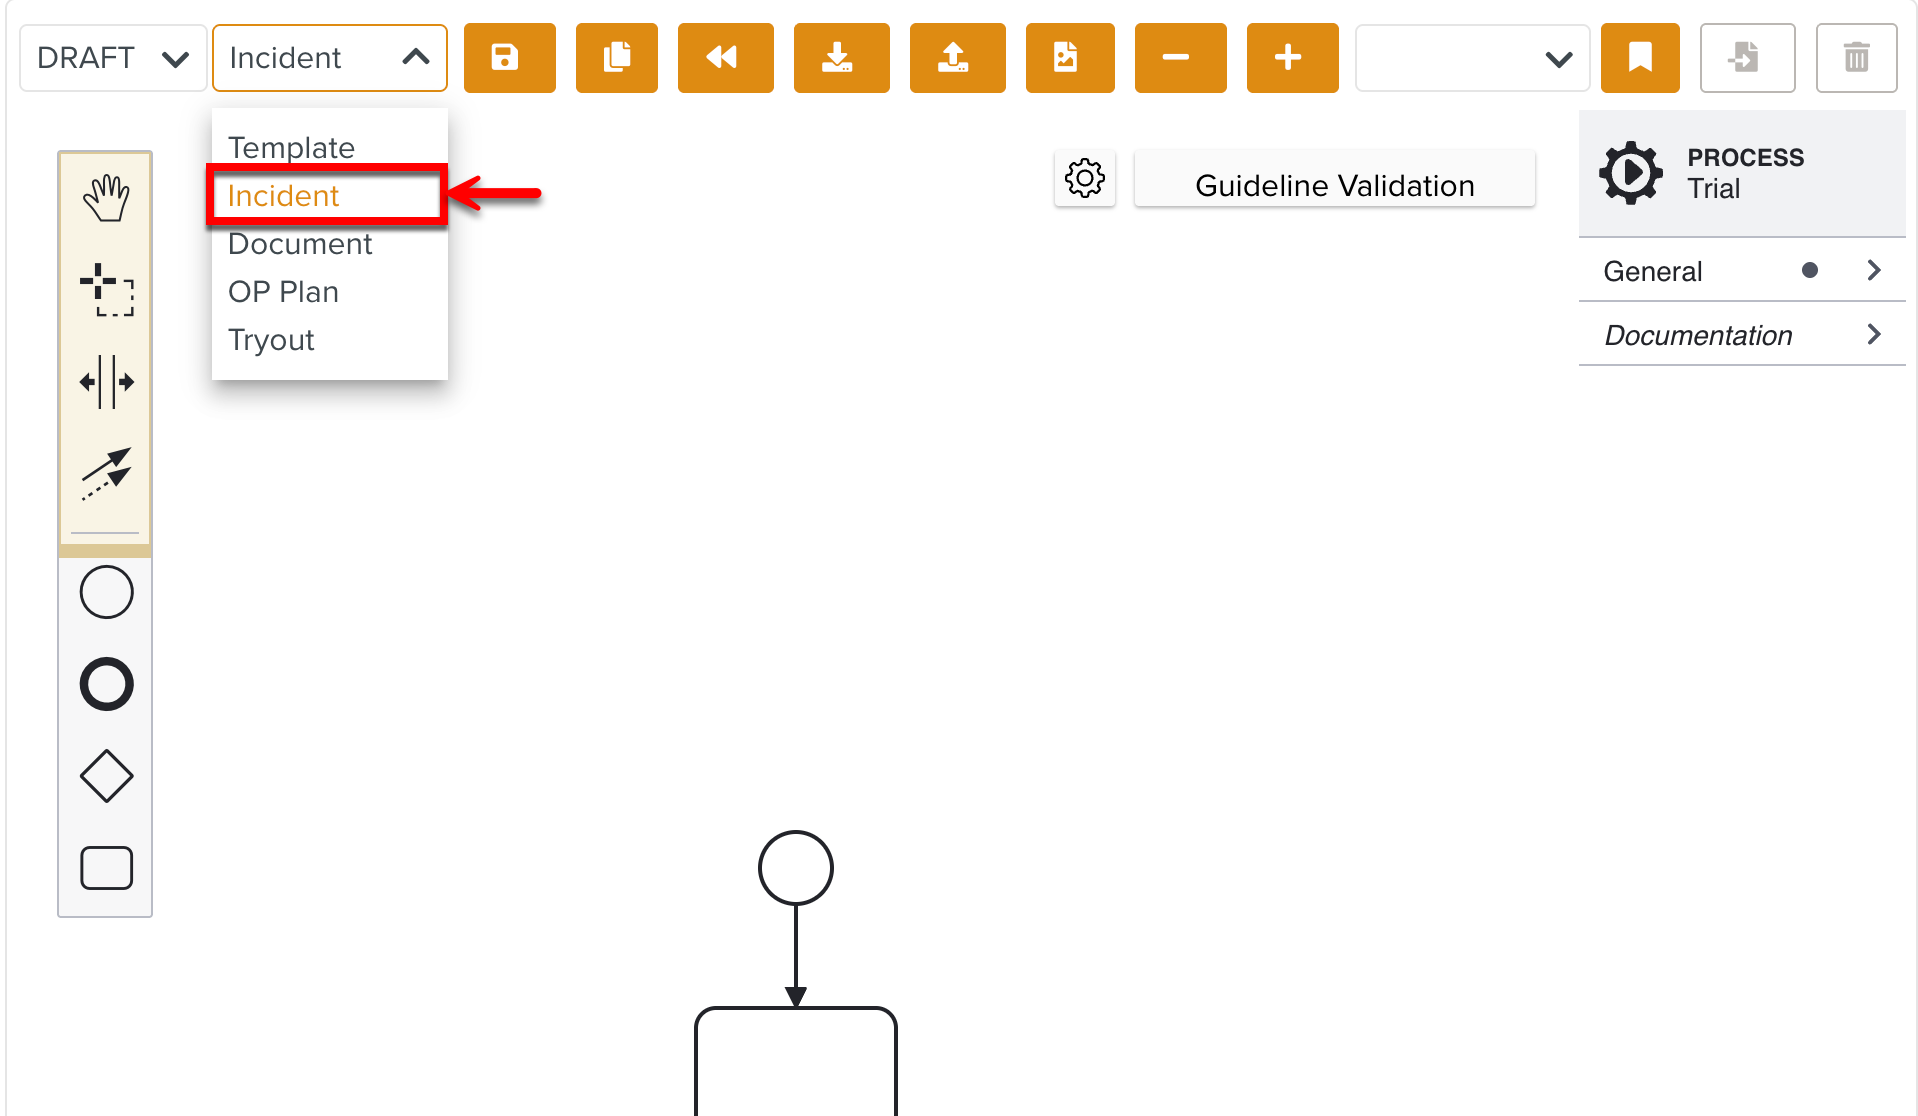
To create a Resolution Flow:
Select the type Incident from the dropdown list as shown below.
Drag the required elements from the UI panel to build a Custom Lifecycle. Link Lifecycle Forms to the User Tasks where required.
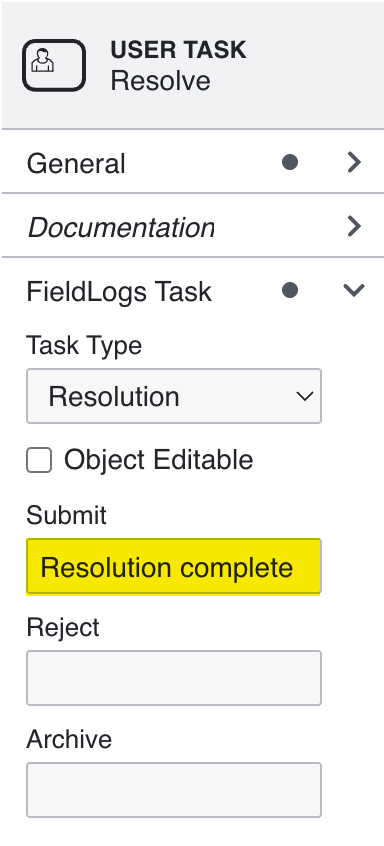
In every User Task, under FieldLogs Task property you can customize the actions as required.
You can select a Task Type from the dropdown.
You can select Object Editable to make the User Tasks editable during the Resolution process.
Specific stages of the Resolution Flow can be made editable where the user can edit the Case.
In each User Task, there are three pre-defined buttons:
: This moves the Case Resolution to the next step of the Lifecycle.
: This rejects the current action. The Case Resolution moves to the stage defined in the Lifecycle.
: This archives the Case Resolution Task.
These buttons are mapped to decision actions that are controlled by a lifecycle variable named 'decision', with values as follows:
Submit = 1
Reject = 2
Archive = 9
These decision values enable conditional branching within the workflow diagram. When a user selects an action, the workflow uses the decision variable to route the process to the appropriate next step.
Additionally, the labels of the buttons can be customized to provide contextually meaningful labels.
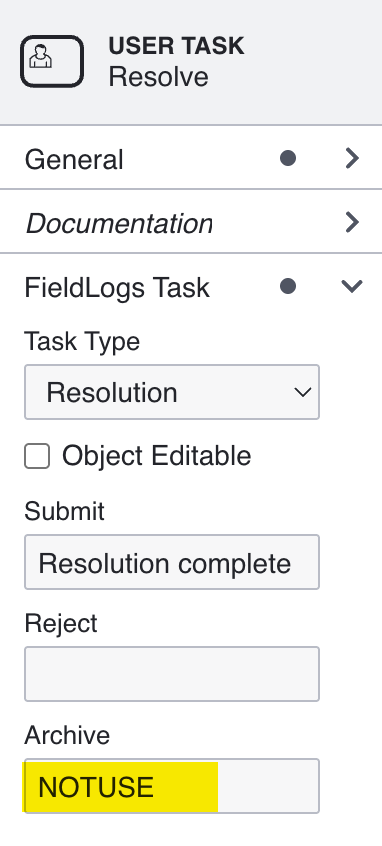
The non-required buttons can be disabled by setting it to NOTUSE. This restricts it from being displayed in the Case Resolution Task.
Click .
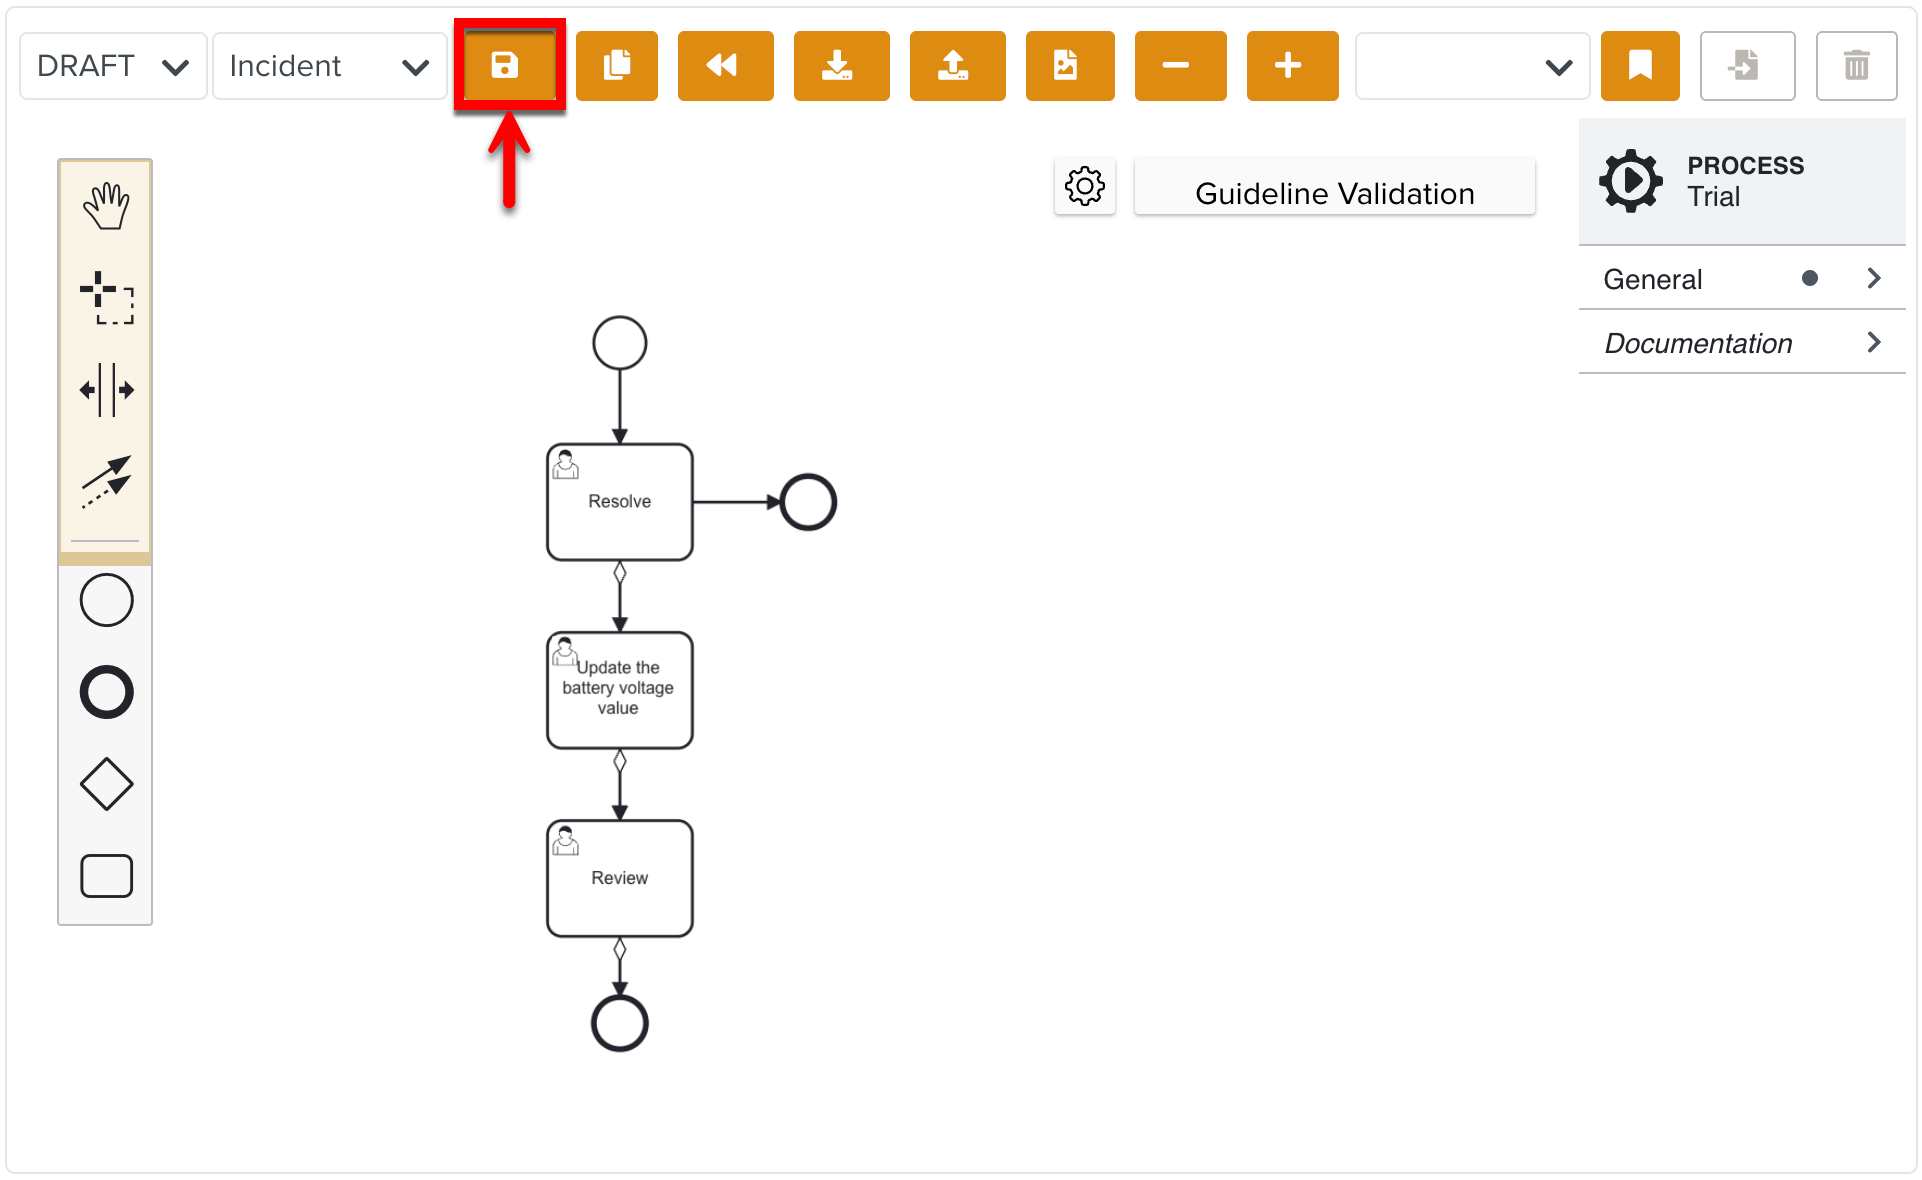
Users have the ability to save the workflow diagram at any point during creation, which will save it as a Draft. This allows users to pause and resume work without losing progress.
When the Lifecycle design is complete, users can Publish it.
Click .
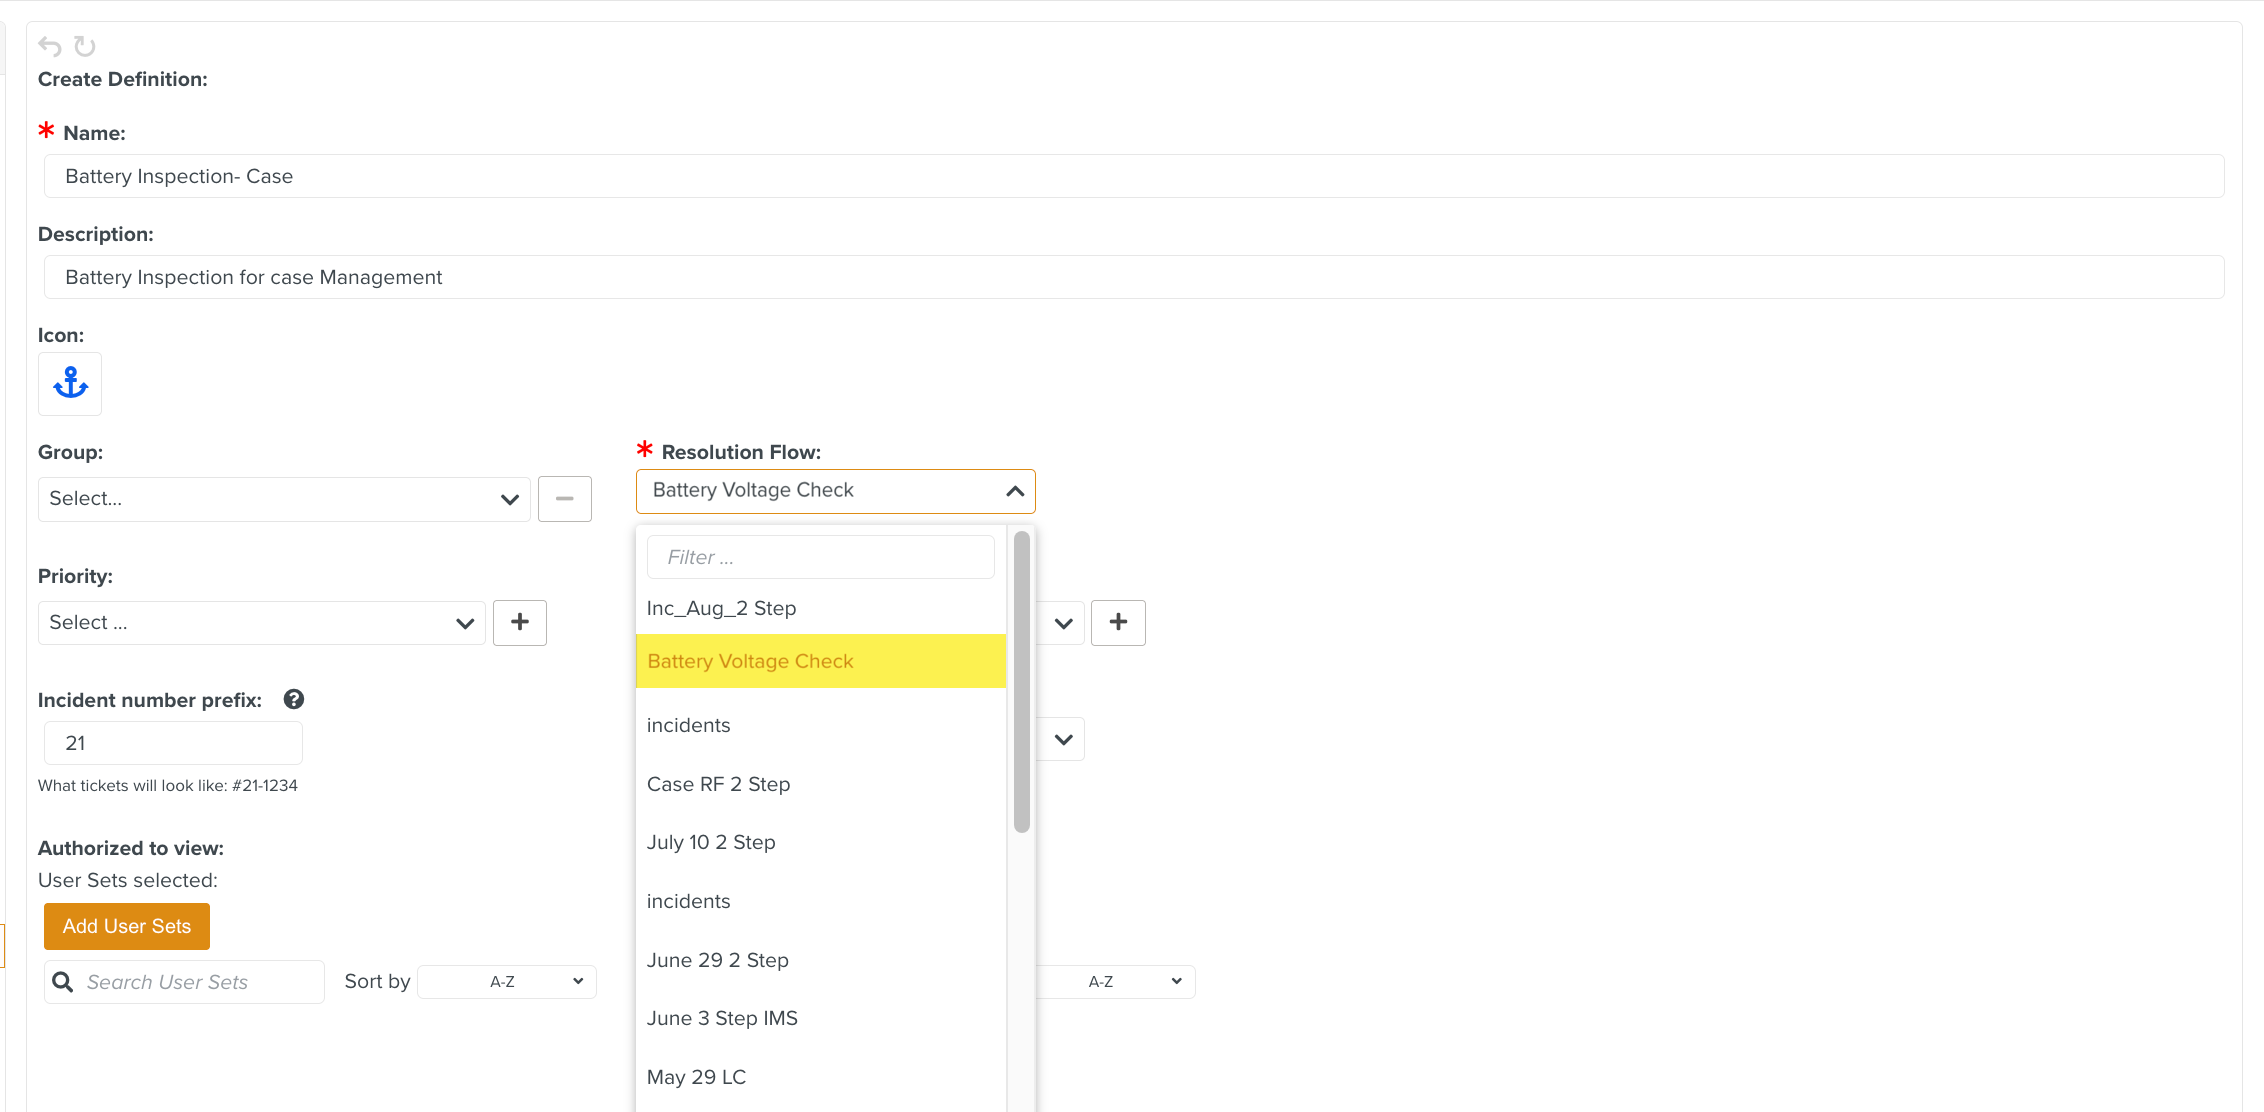
You have successfully created the Resolution Flow. You can use it in the required Case Definition.
Note
There is a Guideline Validation feature, that checks the Custom Lifecycle dynamically as it is built and offers suggestions and highlights errors.